Topic: Cope's GTI (Read 10532 times) previous topic - next topic

Cope's GTI

Hi guys, I thought it was about time to start keeping my build thread up to date on here.

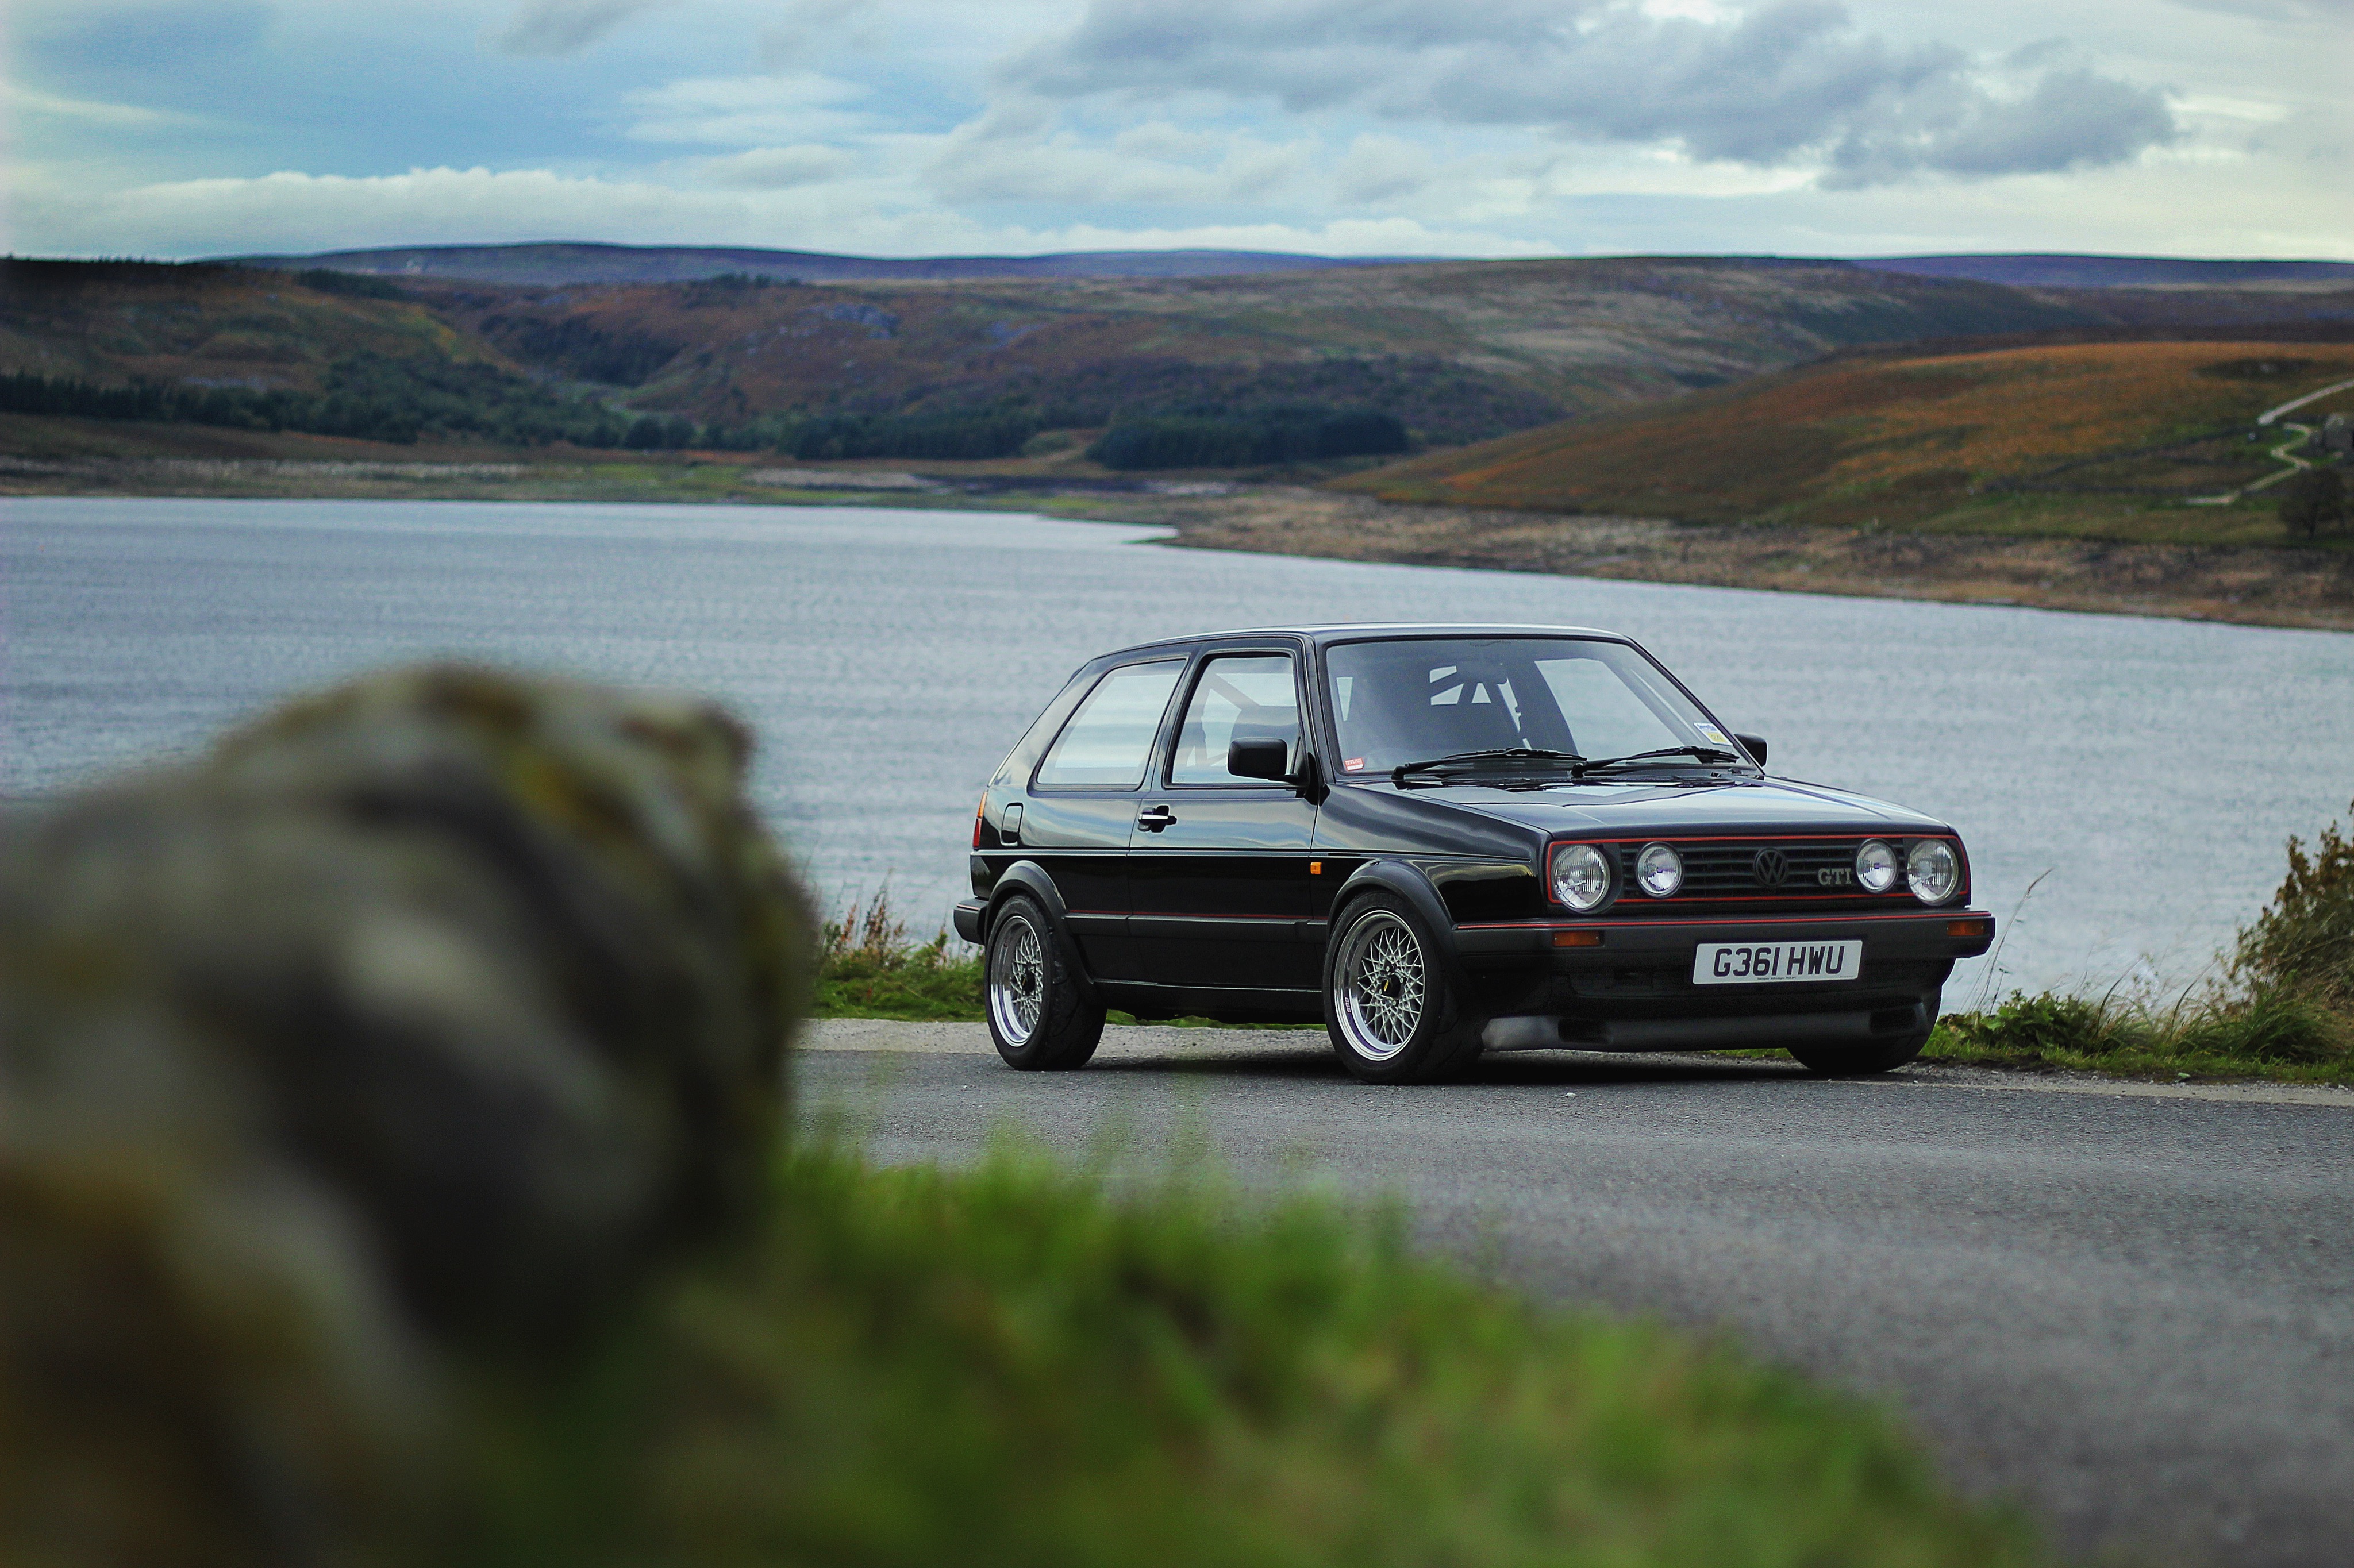
The car: A 1989 Golf GTI 8v.

Specs:
Chassis - KW V3 Coilovers, Solid camber adjust topmounts, standard oem bushes and roll bars.
Interior: full 6 point MSA roll cage, fixed bucket seats, 6 point Schroth harnesses. Full carpets, front sound deadening and doorcards remain,
Engine: 1.8 8v GTI engine, full Milltek stainless exhaust (4-1), Newman 268 Cam. (approx 125-130bhp)
Weight: Approx 950-980kg
Tyres: Nankang NS-2R

Please see my old 82 page build thread here:
https://clubgti.com/forums/index.php?threads/copes-gti.169739/


2007


2020


A very brief background:

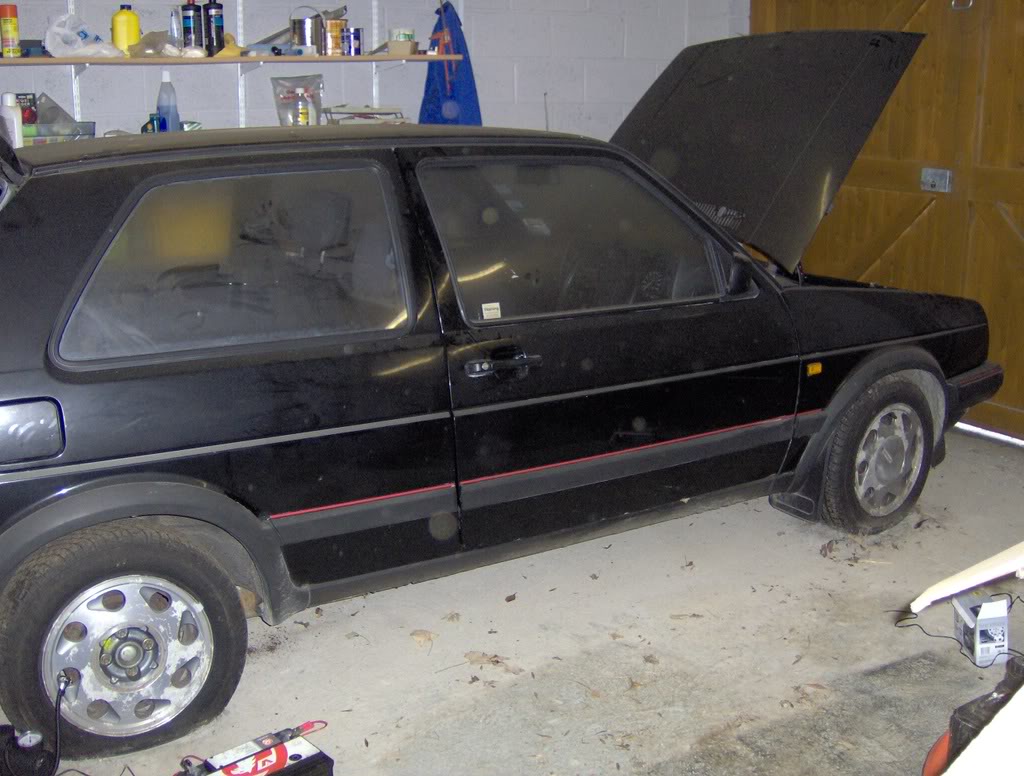
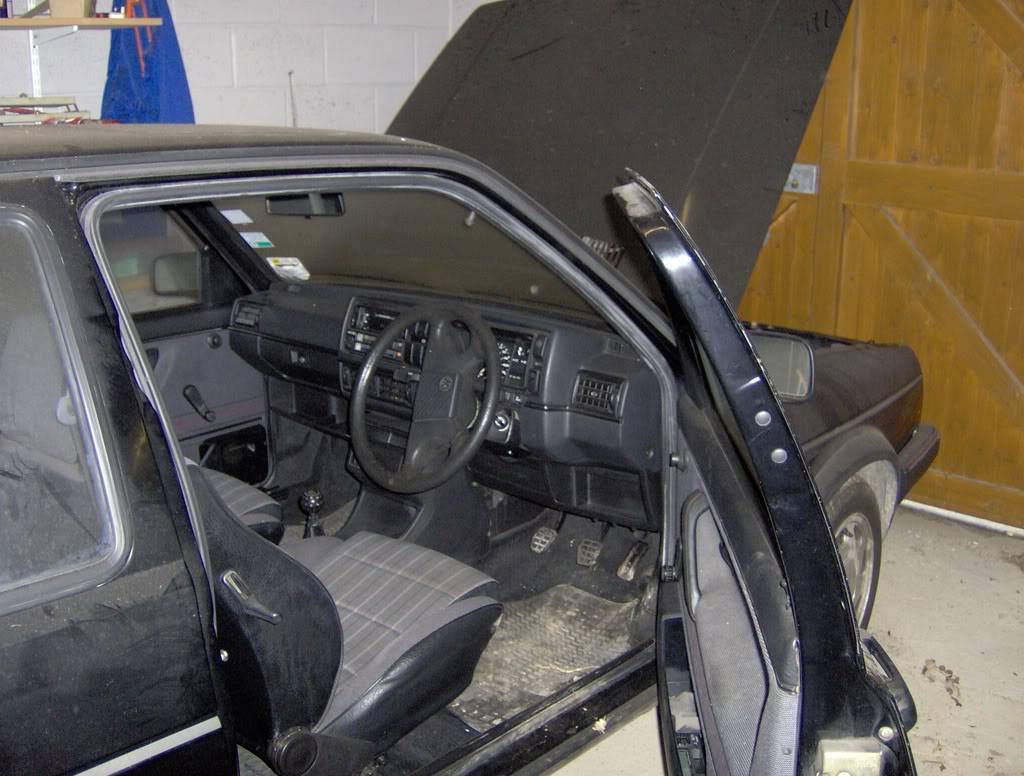
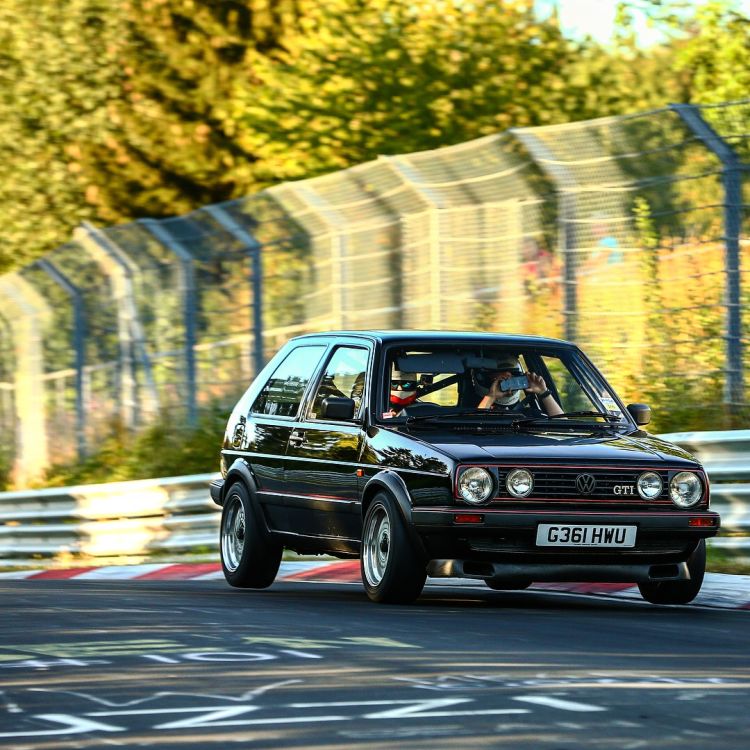
I got the Golf back in 2007, when I was 16. It had been sat in my dads mates garage for over 7 years. It's safe to say the car was in a sorry state! Back then I was still at school  :o working weekends in my local pub, earning £36 a week. I'd bought myself a 3/8 socket set, and set to repairing the car... well probably breaking more than I repaired, but it was all a learning curve.

Fast forward 13 years, and nothing much has changed, the Golf is still my pride and joy, and I still get out in the garage tinkering whenever i can.

Looking back, its been such a journey! Countless hours, sleepless nights, blood, sweat and tears. Breakdowns, road trips, laughs, squeaky bum moments, Nurburgring trips etc etc. It's all been worth it.
I've taught myself how to weld, how to paint and I'm pretty comfortable with any mechanical issues that needs fixing.

The car has certainly evolved over the years, from being my daily for 5 or 6 years, then taking it to a few shows at the weekends, to now where its mostly used on track and sunny weekends. I've always had the same vision, which is to create a car that functions as well as it forms!


------------------------------------------------------------------------------------------------------------------

I will continue on from around 2018 with a Nurburgring trip, and if you are interested, you can read the full progress at the link above.

Nurburgring 2018


Another year and another fantastic trip! It didnt go without its mishaps which I'll touch on later...


We set off to Hull for the usual 8pm crossing to Rotterdam.


We had a nice steady trip over and arrived over the other side for 8am.

We had the usual bunch of lads - Ford in his 3.2 TT and Beardy in his Teg.
This year, the same as usual, we rented a house for the 9 days we were there and I think this is one of the best we've stayed in. It was a 10 min drive to the Nordschelife entrance in Virneburg and cost us £130 each for the 9 days, so great value.
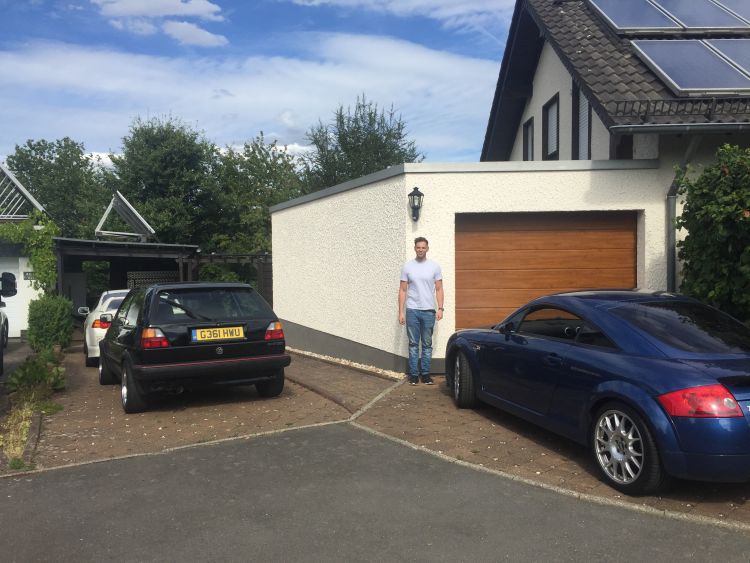


The owners were amazing, super friendly and spoke great English.

After unpacking I gave the golf a final check over of fluids and pressures before making our way to the track.
First port of call after unpacking was to top up with some racey 102 fuel [}:)]


Arrived at the track and went straight out for a lap. Straight away the car felt amazing! by the time I got to Flugplatz I could really feel how much stiffness the cage had added and how much more grip was on offer with the new AR1's.

Unfortunately here is where this report goes downhill for a little while..

Just before Wipperman I went to grab 4th gear. The gearstick was stuck solid. A few more wiggles (yanks) and still nothing. My initial thought was the box has got too hot for what ever reason and it needed to cool. Never the less I kept positive and enjoyed the rest of the lap in 3rd gear -pretty much at full pace :lol:

Just before the mini karusell it suddenly dawned on me that Id have to get out the carpark and up a HUGE single track road with tight hairpins in 3rd gear... this was going to the interesting.

Parked up in the carpark and left the car for 20 mins to cool. Still nothing! stuck solid. I inspected the linkages and everything seemed in order.


Popped the linkages back on and got Ford in the driver seat to give the gearstick a wiggle while I check the movement of the linkages. Next news I let out a little giggle, Ford replies "What?" as we both watch the ball that should have been attached to my relay shaft go rolling down the carpark..:lol: GREAT!

Ford felt absolutely terrible, but I told him not to worry and I must have cracked it on track trying to get it out of gear.

So the inevitable was coming, how to get back to the house. With a quick push in the carpark to get going, the mighty 8v pulled away (alot easier than I was expecting) Next challenge was the 1:3 hillclimb back to the house. The turning up to the hillclimb was a very acute left hand junction in a village. With Beardy's word ringing in my head "theres no way your getting up there in 3rd" I had no choice but to get 2 wheels on the right hand kerb at 25mph, quickly flick the car left with about a turn of lock and stamp on the throttle. Poor Dorris was out gardening and I bet she thought I was a right yob [:-B]

Ford was behind and said the inside rear lifted about half a foot:lol:

I managed to negotiate the hairpin and got back to the house feeling quite proud [:D] That was the first hurdle. Now onto the actual problem.


At this point it was obvious there was a serious issue, this was made more obvious after we attached the bar off my jack on the end of the selector shaft and gave it a nudge and it still wouldn't budge...

Time for a brew.

I came to the ring this year on a very tight budget. At the time I was moving to the other side of the country and was in between jobs so any extra expense was a push! I have Euro breakdown and seriously considered giving them a ring and getting him put on a flatbed and sent back to the UK.

But wheres the fun in that!?

After finishing my brew I'd made my mind up that I was going to fix it. After all I had 9 days off, and 2 mates with me to help...

A quick google German translator and some German ebay later I had a possible gearbox located only 30mins drive away from Virneburg. Only issue was the box code was ATH - a 1993 diesel Passat, so the ratios would be interesting.

I'd been told there was a scrapyard near the ring, just by the GP tack. By this time it was 8pm so we had a look over the fence and spotted a promising looking MK2


Feeling knackered but determined we made our way to Adenau for some food.

That night I found out a stuck 3rd gear in an 020 box is fairly common, and is down to "overshifting" whatever that means! I've watched the footage back and I heel and toed every gear on that lap and didnt do anything untoward... Perhaps a 30 year old gearbox just needs a rest sometimes!

The next morning I was up bright and early and we went straight off to the scrapyard. Using my best german I asked the owner if he had any vw gearboxes, he gave me a funny look and just shook his head. On reflection I hope it was a gearbox I asked for!

Luckily his son spoke perfect english and we went for a tour around the carpark. The mk2 we spotted the night before was for sale as a complete car. There were a few mk3's and other bits and bobs. Managed to find one mk2 but it was a 4 speed so knocked that idea on the head.

Heading back to the car I emailed the bloke on German Ebay and told him we would be popping over to his unit - hoping that he was in.

Most roads around the 'Ring are just like this one!


After trying to get the bloke to crack a smile we made a deal on 100euro for the box and a relay shaft. Not too bad in my time of need!


Did I mention I'd be changing the box on the guesthouse driveway!? Very glad I packed all my tool and even spare driveshaft bolts! ... but wheres that damn spline tool... yep, I'd left it at home!

We were staying next door to the English lads who own the Crown Pub in Adenau, they saw the box on the driveway and came straight round with a big set of ramps and asking if we needed any help. I explained we had everything apart from a spline tool. They made a quick ring to Stu at Ring Garage, who I spoke to on the phone. He said he had a tool we could borrow and if we needed anything else he was more than happy to drive round the area and pick up supplies! - These lads are true gents and I cant thanks them enough for their gratitude!! Even though you're thousands of miles from home in a foreign country, at the Nurburgring you really aren't too far from home at all.

So, onto the task in hand. To put the difference in ratios into context, check the tables below.

The left hand side is my standard ACD 020 close ratio box, on the right is the diesel passat ATH 020 box.


My main priority in doing this job was to not spill a drop of box fluid on the driveway! The last thing I wanted to do was annoy the German couple who owned the house.

Just as I got the car on stands the owner came out and said "problems!?" I said yes... thats when he saw the gearbox. "you are going to replace that!?" ... "erm, yes, if thats okay with you!" ... "of course! you have the garage there, please rearrange it how you want" - 2 mins later he came out with some massive dust sheets, obviously he was concerned about his driveway too!:lol: Again cannot thanks the owners enough for being so kind and accommodating!

First job


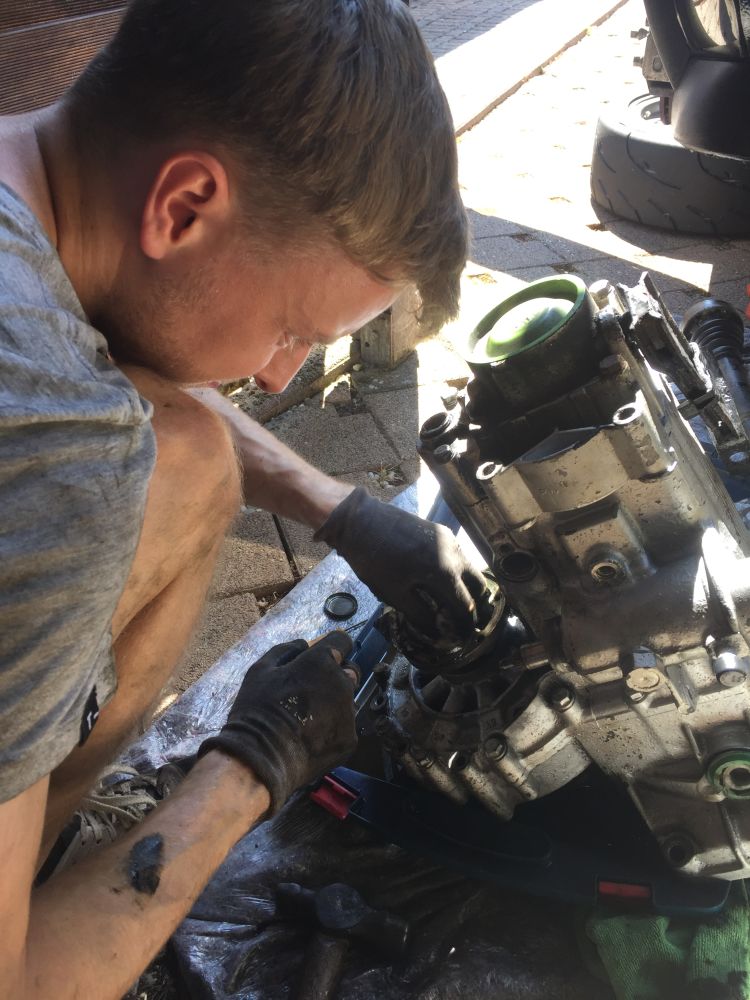
Removal of the box went fairly well.


Until I tried to remove the dreaded driveshaft spline bolts. I got them all out bar 3 bolts, which had completely rounded - No problem I thought, I'll get my Urwin bolt gripers on the job... nope, I'd left those at home too!:lol: Strangely, just before locking up my garage in the UK, I grabbed my angle grinder! Unfortunately it wouldn't fit in the gap between the box and driveshaft, that resulted in me having to take the guard off the grinder to gain access, not something I was comfortable with but it had to be done.


After this hurdle it was the end of the day, yes it really had taken that long to get 3 rounded bolts out!
Next morning the lads helped man handle the box out!


I had checked online before buying the box at 020 specs and this new box was listed as exactly the same apart from the ratios. I spent til lunch time getting the new box in and bolted up - all going well so far!

Trying to bolt the driveshafts up I suddenly noticed they were 90mm flanges and not the 100mm I needed for my driveshafts... balls! At this point we were all knackered and I thought that would be end of the trip.

A quick google and some encouragement from Nige, I was back out swapping the flanges from one box to another. This again proved to be a complete pain, 2 hours later all the cups were swapped over and I was able to bolt the driveshafts back up!


Marked up all the bolts so I could see if anything came loose


Got the car back on the ground, topped the box fluid up with the cheapest stuff I could find and went for a test drive!


HUGE RELIEF! the box is lovely, smooth as silk and everything aligns and slots in as it should.
The ratios are completely laughable though! I knew the track would be interesting, now I'd be using 2nd, 3rd with occasional 4th.

Got back to the house and checked everything over, everything looked spot on! We'd done it!!! [:D]

By this time it was getting late so I jumped in the shower, and we all headed straight for the evening tourist session.

As you can imagine I was a little apprehensive about going out. But i needn't have worried! after a couple of miles my confidence in the car grew and we were back on form, albeit alot slower due to the box.

Smiles all round!


saw Dale from Bridge to Gantry in the carpark and he was very exited and seemed to love the golf, before I knew it he'd jumped in and started it up going "wooow" :lol:


Ended up doing 2 laps and felt so pleased we'd managed to sort it! Only issue I could find was I was boiling my cheap box fluid, so replaced that with some decent stuff and had a leak from the speedo cable hole, which i fixed with about an inch of high temp sealant :thumbup:[:D] After all the box needed to last me a week and get me home!

Drove home with a huge grin and sat down to a very well deserved cold one!


For the res of the week we lapped hard and had a fantastic time!!!


This year the golf got alot of love! everywhere we stopped and even on the motorway people we taking photos and asking questions about the car [8D]:thumbup:

We stopped a few times to grab photos ourselves. It really is a stunning place!


:hug:


Got some lovely photos on track!


I'm claiming all 4 wheels off!

https://www.youtube.com/watch?v=NcuoyTHLsAg


The only issue I had through the week were the exhaust rubbers. No matter which ones I try they always melt!


Re: Cope's GTI

Reply #1
So had to make do with some makeshift hangers


One of the highlights of the trip was being able to take Jeffery out for his very first lap at the Nurburgring.
Him and his family had travelled to the 'Ring from the Netherlands to watch the classic racing the week after we were there. They were staying next door and got chatting to them. I said we were heading to the track the next day and if he asked permission from his mum I'd be more than happy to take him for a few laps. He was beyond excited and his week family holiday just got a whole lot better!

[MEDIA=youtube]bSBvBZx0IXA[/MEDIA]

Jeffery's family invited us round for a BBQ as a thanks. We had a fantastic time a have some new friends in Holland.


Throughout the trip ambient temps were around 33degrees C! even at 7pm at night. That meant an alarmingly high track temp!!


As a result Beardy and Ford decided not to go out after both experiencing over heating tyres and brakes.
The Golf still felt great so I kept lapping, I think Jeffery came out for almost all of them!


The AR1's were really dealing with the heat well and even though they took a mile or so to warm up the level of grip compared to the NS-2R's is next level!


To sum up an amazing trip I had the most enjoyable last lap I've ever done at the ring!!
After an accident before the miss-hit-miss a little Swift Sport tagged onto the back of me and suddenly I found myself really pushing. All within comfortable limits, but we were very evenly matched and we were both having a whale of a time!

https://www.youtube.com/watch?v=bSBvBZx0IXA

On our way back to the ferry we stopped off at Micheal Schumacher's karting, where I managed fastest lap of the week [:D]


Getting stuck in a traffic jam in in a black car with no aircon, in this heat is never fun! but 47 degrees!!!?!


On our way back we hit a derestricted part of the motorway and I decided to open the taps up and see what the new box had in it. I had all my tools in the back and my old gearbox... but I still managed 142mph!  You might wonder how I managed to record that, well my speedo goes to 120mph and the needle was wrapping back round. Ford was behind in his TT and he said he saw 142mph! The old girl does well!

We made it back to the UK safe and Sound!


I'll be uploading more videos shortly so will post them up here :)

Re: Cope's GTI

Reply #2
So, It's been over a year since I updated this! Lots has changed, lots has happened.


I'm out of my parents now in a little house with the missus, bonus is we have a garage, its tiny but a garage non the less! It didnt have power so I've put that in. I didnt like running loads of power tools through a 25m extension.


We will start with the exhaust. the mid box on my Miltek classic system started to rattle. I contacted Milltek and they send me out a new one. I decided to make a straight through to back box system using the old box as a template.


This was a fun little project, but ultimately the car was awful! it was loud, really loud. It had lost all its rasp and was all drone. So that idea went out the bag!


Seats

I did a trackday at Croft in Nov 2019, which was brilliant. But one thing was letting the experince down -the seats... Although mk2 Recaros are a lovely seat, for track use the just aren’t stable enough.


Originally I swapped these for a set of Recaro Pole Positions – perfect, just was I was after!


After trying them out, they were the wider ABE versions. Being a slim Jim they weren’t suitable for me so I sold them. I was then on the hunt for some SPG’s or the narrower FIA versions. After some searching and being a bloody tight Yorkshireman, I just couldn’t justify £1200 on a set of seats –Reading this thread, you will all probably know already, I’m fussy. Things have to be just right or I won’t do It and this was no different.


After some research I found out that the older style Corbeau Clubsports were apparently discontinued because they had used the same/similar mould as the Recaro Pole Position. The price was much more suitable for me too, at around £130-£150.a seat used. That’ll do nicely.


Now onto the next issue.


I’d got hold of some mk2 golf bucket seat subframes which bolt into the factory runners. There were 3 immediate problems. Firstly the weight – despite the car being more track orientated I’m not chasing weight saving, but these were a joke. Easily as heavy as the standard mk2 recaro if not heavier. Secondly, due to the design of the factory sliders and the way the subframe bolts into the car there was 3/4mm plug up and down. Thirdly, they sat SO high up. I’m 5’7” – a short arse by any stretch and even I felt like Donkey Kong on Mario Kart.


You can see below how high the seat sat in the car.


So a rethink was in order.


The only real way I was going to be happy was chop out the original factory mounts and weld in tubular rails. So I got a set ordered up and set to the rails with a spot drill. Not a fun job!


I used chocks of wood to get the seat where I wanted to. It’s a long process but it’s the only way to get it 100% correct.


Trying to make diagrams, take measurement throughout. Not only must you get the back and forward position right, left and right but you also have to make sure its square, a pain on a mk2 floorpan!


With the seat fitting in progress, another issues raised its ugly head! This time the steering wheel angle and position. I wanted to be sat as low down in the car as possible with my eye line just above the top of the wheel. I ended up making some spacers for the steering column to bring it down around 2.5 inches (the top of the wheel is now inline with the top of the dashboard)


I’ve also spaced the wheel out closer to me by 70mm.


The driving position is now perfect for me! With the clutch in my leg is just off from straight and the wheel is perfectly inline with me shoulders -  well chuffed!


While sorting the seats out I was on the look out for some harnesses. I’d decided on 6 point for the most safety I could. I spoke to a nice chap on fb marketplace who was selling a Schroth harness for £100. I messaged him to ask if he had 2, he said he didn’t – I snapped it up regardless.


To my amazement when the parcel arrived there were 2 sets in the box! I messaged the bloke and he just sent me back a smile! I quickly fired him some beer money over paypal, as a small thankyou. Got very lucky there!


While this was all going on, the diesel Honda daily was still going strong, but I wanted a change, I’m a “car guy” why do I want a diesel Honda Accord?! It had done its duty, carting me and my stuff back up from London.


I’ve always fancied an E36, and when one came up locally for a very good price I snapped it up. So here she is the “new” daily.


Shes a 323 se – Straight 6, manual, dove grey leather, and not much rust. (I've welded 2 jacking points in and welded in some new ARB mounts, but other than that shes clean)


It’s a proper cruiser and silky smooth, I’ve had it a year now and its been very reliable. Had the water pump/viscous fan poo itself but that’s all so far. I’m really loving learning RWD even though this is a soft 323 I can totally see how front engine RWD is the way to go for a proper driver’s car. Going sideways is also very very fun. J


With daily duties sorted, back to the seats.


I can’t leave anything alone... So I decided I’d spruce the seats up. I wanted to retrim the centres in GTI tartan but the more I looked at all the VW tartan range I didn’t like any of them.


I started by wrapping some of my check shirts around the fabric to give me some idea.


With my MOMO steering wheel being signed by Jackie Stewart I thought it might be nice to do a little homage to the Stewart Clan, using Black Stewart tartan.


Something different but a nice touch in my hunt for “clubsport” perfection [:D]


Yes, I trimmed them all by hand – took bloody hours. Pricked my fingers more times than I can tell you. Turns out I’m a dab hand with a sewing needle!


Must get that tartan lined up!


Then Sh*t just went too far!


Very very pleased with the outcome! [:D]


Those beady eyed among you may have also noticed the gearstick…

Yet another of my “great” ideas – as always it was a pain to make but well worth the effort.


With the seating position sorted I wanted to bring the “shifter” closer to me also. With my 020 box being a rod shift this poses more problems. The main one being that even with my short shifter and the poopr raised up in the cabin the throw was HUGE, felt like a truck.


Back to the drawing board.

I started by rebuilding the shifter box with new bushes to give me half a chance


I then focused my attention on the selector shaft, I’d only ever heard of this being able to be done but hadn’t physically seen it done. I had a spare shaft so used that to chop up.


This had enabled me to raise the shifter inside the cabin by quite a lot and keep the short throw on the lever. It’s no CAE shifter and it might not do my synchro’s any good, but only time will tell!


Re: Cope's GTI

Reply #3
With the seats and harnesses sorted :)


Next up on the list was the exhaust. For years I’ve had the same issue with exhausts, in that they never sit or hang right even with new hangers. Plus I could never stop the rubbers melting and/or falling off.


So, I decided to cut all the brackets and hangers off the car and off the exhaust and start again with a new more modern design.


I started by getting the exhaust where I wanted it on some industry spec materials. A washing basket, drill box, coolant container and some wood….


I then started to mock the new hangers up using some stainless rod. (I’ve already replaced the silicon hanger for a stock rubber part, with the same dimensions)


I designed them so all the hangers on the exhaust and the car face away from each other, meaning the rubbers should never fall off…


Substantial… ;)


With the exhaust in place, sat up nicely in the tunnel and plenty of clearance over the rear beam, the backbox would tilt upwards and cause the back end of the box to hit the floor pan.


I made a few cuts and slight tweaks before welding it back up


With the exhaust done and in place the car sat like this for a while


to sort some..ermm.. you guessed it more rust repairs..


I’d noticed the last few time I’d driven the car some oily residue on the passenger side front wheel. I took the coilovers off to make sure they were okay. I’ve had waterproof coilover socks on them since new, so its nice they still look that way! Best £20 I’ve spent


Although they looked fine I noticed the dampers weren’t keen to expand back to normal, so I sent them back off to KW to see if they could dyno test them for hairline cracks.


They came back and said there was a slight imbalance, so they gave them a refresh but they had tested them and didn’t find any leaks. So something to keep an eye on!


With the coilovers back on and the car built back up, I decided to booked on to The Mk2 Golf Owners Sprint day at Curborough Sprint Course. Before that I needed a test run, so took him out for a good old raz around the dales J


Got some nice pictures on the way :)


About a mile from home the car wasn’t happy, stuttering and died at idle.

I had a look under the bonnet and couldn’t see anything obvious, wiggles some wires and got the car going again. When I got home I found that the hall sender on the dizzy had a really loose connection. I fixed the connector by taking the metal pin out and bending it so it has a strong bite. I didn’t want any more issues so hunted down a new Bosch dizzy at GSF. A pretty penny at over £400… yes you read that correctly… lucky for me they had a 60% sale and a surcharge back for your old one. So it ended up costing me £75. – all things considered I couldn’t grumble!


Quickly got that on and realised I don’t have any way to set the timing up… a ring around a few local garages and one place had one in the bottom of his tool box. Champion! I had a look on the forums to understand what I’d actually have to do and how to use a timing light. Turns out its dead easy and I made it to Curborough the next day.


Conclusion after the drive


This was the first time driving anything with a proper fixed bucket seat and harness. One that has been totally tailored to me in every respect – From the seat position, to the seat height, to the steering column height, to the steering wheel spacing and the gear stick position.


After all the hard graft and countless hours overthinking every detail, I have to say it’s been well worth it.


On the road the car felt fantastic. No more play in the seats, no more having to keep yourself in the seat by gripping the wheel tightly and pushing your thighs into the seat bolsters – Just totally solid and confidence inspiring.


Perfect!


Next update will be Curborough Sprint Day :) Stay tuned…


Re: Cope's GTI

Reply #4
Thanks for the kind words, and sorry for not updating this sooner!

So Back to Curborough and what seems like a century ago!


This was organised by the Mk2 golf owners club, its was a fanatically organised day and so good to see so many old faces and meet some new ones!
Lots of mk2s to see, from championship winning 16v’s to converted 20v turbos to vr6’s they had it all!

The Golf was going well all day, as I was learning the track and lines better each run.


The only thing I wasn’t happy with was the short shifter I made still wasn’t quiet there, 2nd was really hard to find, which proved a pain on track. But that was a job for when I got home.

After the day came to a close I joined the group gathered for the awards. Unbelievably to me I’d actually won “fastest track car” of the day, I bet my face was a picture, never ever did I think I’d be picking a trophy up!! What a result after all the hard work!


Loaded the car up and drove all the way home with the biggest grin!


Re: Cope's GTI

Reply #6
The 2nd gear issue at Curborough was rectified with modifying the input shaft again. Many iterations, finally landed with the most ideal solution.


The shifts now feels silky! 


In the process of all this I’ve moved into a little house, has a decent driveway although its tight and a little garage which is really tight! But its somewhere dry which I really appreciate!


Finally got all my tools organised which feels great and my mate put some leccy in the garage which is a huge improvement!!


You might notice my nice shiny compressor sat at the back, that’s new! I’ve decided I’m going to give this painting lark a proper go. Cans have been fine for me for years but the finish soon dulls and it always needs redoing every year or so…


I’ve bitten the bullet with the Birsch 90l Belt driven compressor. They do a spray kit on ebay with all the lines, water trap, GT Air gun etc for a reasonable price.


I decided to start with the tailgate, some rust was starting to come through under the boot lock and I wanted rid of the rear wiper, for 2 reasons: 1. I never use it and 2. The wiper sits at a different angle to the X in the cage, which bugs me. I also have a pretty strong hatred for de-wipered cars with rubber bungs, if I was going to do this it had to be properly.


I’d sourced the black vinyl boot trim without the wiper/washer holes, so I set about welding up the holes.


Made myself a spray booth…


Got fist coat of primer on


At this stage you are probably thinking… no way, don’t paint in there, the space, the dust, the bugs etc etc… and you would be completely right. But whats the worst that could happen!?


Yep the worst happened…


You’ve got to laugh.. or cry. Now what I’ve learnt here is I’ve banged on too much base too quickly so the solvents couldn’t escape. I’ve been watching a guy on Youtube called the Gunman, he’s from Australia and paints in a booth set to 35 degrees… ahhh that’s where I went wrong!


So back to the drawing board. 2 days later I had the boot lid sanded back to where I first started, at that point you’d think I’d just get it painted and be done with it, right? Wrong… I decided I may as well give the full rear end a refresh. In for a penny in for a pound!


This time I went easy on the base coat. The clear went on really nice, it’s the most exciting and stressful point of painting, if anything goes wrong at this stage, its back to the drawing board.


This is out of the gun, ready for wet flatting


Wet flatted with 3M 3000 Trizact disc by hand, then used G3 compound and 2 different Menzerna finishing polishes.


I have to say I’ve surprised myself with the outcome! The only unavoidable thing was dust settling in the clear coat, it wasn’t a huge issue because you can wet sand them out but its more hassle and you end up with less clearcoat!


Got the vinyl trim on, very happy with the factory look of this!


With the rear of the paint done, attention shifted to finding a passenger seat, trimming it and welding in the seat frame for that side.


More to follow [:D]

Re: Cope's GTI

Reply #7
With the success of the rear end, it was time to tackle the crusty rear arches (or just one of them for now) again this was meant to be a “quick” job, lick of paint on the lower half and be done… I eneded up painting the full rear quarter and lower door.


First job assess the situation


Not too bad, but definitely needed some work.


No going back now…


Got it full welded in making sure not to get too much heat in and warp it. Made sure the arches still sat nicely.


To secure the inner to the outer I drilled holes all the way along the front edge, this will be getting covered with the GTI arches so I’m not fused if they don’t come out perfectly level.


The inner lip as then seamsealed, painted and undercoated to prevent any water getting between the panels.


For the inner arch I totally got rid of the lip and brought both inner and otter arch out to the same level as the plastic covers. This just future proofs the arches in case I do get bigger/wider wheels at any point.


Previously I’d welded tabs on the inner arch to secure the covers with cable ties, but the arches never sat exactly how I wanted them to. So to overcome that Ive welded some captive nuts on the lower lips. This means I can now secure the arch with some really nice little M8 flanged bolts.


With the arch in the body work could take shape. I had to weld in another little patch under the rear quarter window seal.


At this point my concern was how was I going to paint up to the roof gutter? I know they are a massive pain and never look right when they have been off, mine are perfectly straight so I didn’t want to touch them.


Theres more updates to come so I’ll share my little pikey tip with you in the next update! [:D]

Re: Cope's GTI

Reply #8
Another lengthy update, apologies.


So back to the painting, what’s the little dodgy tip for painting up to a roof scuttle I hear you cry, the answer is an old USB cable with the ends cut off.


Once stuffed under the seal it pushes right back and pulls the lip of the seal right up, meaning you can paint underneath it, then remove the cable once its all done and dry.


This paint wasn’t without its problems, one of which was the room I had, some areas I physically couldn’t fit the spray gun into the correct position. I again had some funny reactions with the primer. But I sussed out what was going on. It was reacting on every area I’ve painted with cans, which makes sense as the primer must be reactivating the solvents in the old paint. That meant a quick flat down and dust back over with primer.


At this stage, I spent quite a lot of time with a block and some 600 paper, making sure everything was as flat as possible and any low/high spots taking care of.


Here I came across another issue, where I’d welded the patch under the rear quarter window seal I’d got too much heat into it and warped the metal. This meant every pass with the block the panel would spring in and out (a little bit like a coke can, if you push opposite sides) After some reading up I’d found an old hot rod thread online. They suggested getting the area really hot then rapid cooling to reform the metal back to shape.


So I set to with the heat gun, got the area extremely hot then a blast with the air line, and “ping” it went right back to shape! And solid as a rock when sanding :) the old tricks always work the best!


So now I could get onto base coat.


And then onto clear. Here are the results.


Straight from the gun


:) very happy with that. I found the process much like painting with cans, prep is key. And its best to get the clear coat on with full paint flow, full fan, and nice and thick to give the best results.


I did get a fairly hefty run in the lower panel, but this was sorted with a razor blade and some wet and dry.


I did have a moment of panic. Once the paint was dry I have these little dots in the paint surface.


I had a feeling this might be solvent ‘pop’ again.


But luckily it was just overspray – if you look at the pictures above out of the gun you will see how hazy the garage is, I painted with the door shut to reduce dust and had no means of extraction, which meant the overspray was just landing on the fresh paint.


Once the paint was left for 3 days to fully cure


It was easily rectified with the flatting and polishing process [:D]


Then the car could be put back together, along with some new red stripe vinyl which I design and produce to factory specs.


And that’s the paint complete! Bloody stressful process! Very glad its over (for now) Theres plenty more that needs painting…

Re: Cope's GTI

Reply #9
After a wash the Golf was all ready for Anglesey.


We had a bit of weekend planned, Saturday was karting at Teeside with 16 other lads, and Sunday was the trackday.


Teeside was brilliant, 20min Quali and 40min Race, started dry and finish wet which got interesting! But managed to bag me 1st place after a hellish battle for the last 20 mins of racing.


Anglesey is 3.5 hours drive each way, so we headed up on Saturday night and stayed over at a mates on the island.


Loaded up with tools, spares and over night bags


The car drove really well, I always forget how good it is. my daily is a silky smooth e36, but this trumps it by far! We sat at 85 most of the way and it was effortless, well ahead of its time.


Got some photos and better photos of the rear quarter whilst grabbing some V-Power


Lovely spot!


The next day we were really lucky and woke up to a clear day which was not forecast.


The day was organised by Track Obsession, I have to say they did a bloody excellent job!
Free bottle water for drivers, free photography to name but a few touches!

After the sighting lap I got myself out, this is the first time on track since fitting the seats and harnesses and instantly I was smiling ear to ear.

Christ it goes well! You really cant simulate on the road how fast you can actually drive on track, and it blows me away every time!


On the next few sessions I took some mates out, its always fun taking people out and seeing their reactions!


One of my favourite pictures from the event! Top tripod!


I was finding I was locking up the rear inside wheel on heavy braking zones, so it may be time for a proper bias valve.


Sorry for the photo spam!


The only issue I had all day was the dreaded 3rd gear getting stuck AGAIN!...

I changed the box after the ring, albeit another second hand one, this happened right at the end of the day and luckily we managed to pop it back out! So I could drive the 3.5 hours home.


I’m told its to do with a poor design on the 3rd gear hub, where the keys pop out and then you cant release the gear. So I’m at a dilemma stage, do I get the box rebuilt. I’ve called a few places and a local place is very familiar with 020 boxes and he was confident he could rebuild it for a ball park £200. Which isn’t bad at all!

Having said that, now might be the time to upgrade to an 02A? get one with a cable clutch so I don’t have to convert to hydraulic. The maybe send that for a rebuild.

Ratio wise, if I got for a mk3 GTI box (CDA), I’d have to get a 4.9 final drive to get the gearing the same as I have now – which I’d definitely want.

Re: Cope's GTI

Reply #10
To finish here’s an onboard from Anglesey.


https://www.youtube.com/watch?v=y7wFtspTWPU&t=761s


I start to pick up a decent pace as I’m trying to keep up with a K24 Accord Type R (240bhp)

I seem to do well in the corners and brakes, but he inevitably pulls away on the straights. You’ll see the 3rd gear get stuck which ultimately ends the session!

Lots of fun!

Re: Cope's GTI

Reply #11
Couple of updates, I'd book Blyton park but it got cancelled due to lockdown number 2.
I've managed to rebook it for this Sunday and thankful its still going ahead!

I sent my gearbox off to Stephen A Brear Gearboxes, in Leeds. For a check/rebuild.
Over the phone, Dave was fantastic, he knew exactly which gearbox I was talking about and swiftly turned it around! He called once the box was stripped to say it was in fantastic condition, and he couldn't actually find a problem with 3rd... The keys on the hub were still in place, and everything was in order. I was hoping he would find a problem, but never the less he swapped the 3rd gear hub and keys for peace of mind - cleaned the syncros, built the box back up with new seals etc.

Dave recommended that I remove the short shifter I've made, as it might just be this causing trouble. Although the problem in Germany was before I'd made the short shifter. For now I'm keeping it as is because the whole driving position has been tailored for me and at this stage would be a pain to change. If the box poos itself, it poos itself... I've decided to go for an 02A once I get the ABF built up.

Hopefully it survives Blyton...

Cant recommend Dave enough, extremely cheap and a turn around in less than a week!
http://www.stephenbreargearboxes.co.uk/

I've got the box back in now, but havent tested yet.
If you watched my Anglesey video, you might notice a humming noise when cornering hard left, I decided to replace all the wheels bearings for peace of mind. Once the hubs were off it was easy to hear it was OSF with the issue, and you could also see a build up of grease around the back.


I'd bought some SKF bearings for the front.


Then stripped them all down, and rebuilt with Redline CV-2 high temp grease, this should hopefully give them some future protection.


I started on the rear bearings last night, just got one side done. Same grease, this time with FAG bearings.


While the front hubs were off I decided to add as much caster as I could onto the top mounts. I measure a 20mm increase at the mount, no idea what that is in degrees. But it's off for an alignment this Friday :)


I did plan to go for a test drive yesterday, but the car died on my drive and wouldnt restart. I track it down to no spark, then to a dodgy connection at the coil. Its the wire that feeds the hall sender, so the rev counter didnt jump while cranking.

While I was there I went over the bay and cut off any shoddy connectors a redid them.


Gave it a wash the other day, nice to see the light of day!


Fingers crossed for Blyton :D

Re: Cope's GTI

Reply #12
Another great update!

On the bearing subject, have you thought about using Polo rear bearings?
Mk2 Driver
Mk2 Silver 8v
Corrado G60 Turbo
Mk2 Red 8v
Mk2 Grey 16v
Mk2 BBM ABF
Bora 20vt
Mk2 Green VR6
Mk2 Green ABF
Mk2 BBM 20vt
3.2 TT Roadster
Mk2 Red 16v
225 TT Coup
3.2 TT Coup
Mk4 Anniversary
Mk7 Red GTI Performance
Mk2 Red GTI Restoration

Mk2 BBM R32
911 Carrera 4S

Re: Cope's GTI

Reply #13
Thanks mate!

Yes I have thought about it for future. I was in a rush with this before the track day so went for the easy/option I know!
I last put rear bearings in a few years ago, and in honesty I still think they were totally fine. I'd had a grumbling on track at Anglesey so just replaced the lot before Blyton for peace of mind :)


Re: Cope's GTI

Reply #14
Brilliant thread, you’ve done a great job with the body work and home spraying.